Tutorial: This Mama’s Fab Travel Chair
This fabric “high chair” is perfect for away from home dining.
It’s no 5-point harness, but it helps secure them in the chair.
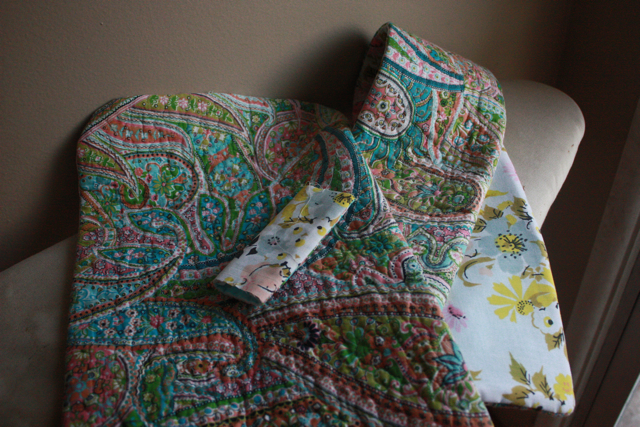
This one was made from an old thrifted, quilted ottoman cover
Gather materials: Quilted fabric for outer*, cotton broadcloth or similar for lining, Velcro.
*Batting combined with broadcloth can also be used.
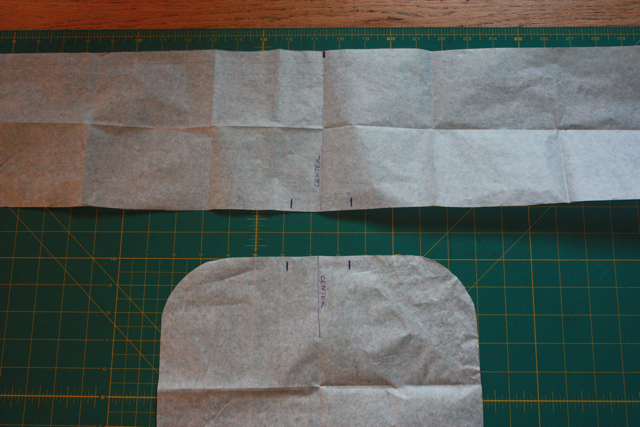
For this one, I used a thrifted bedspread and bed sheet.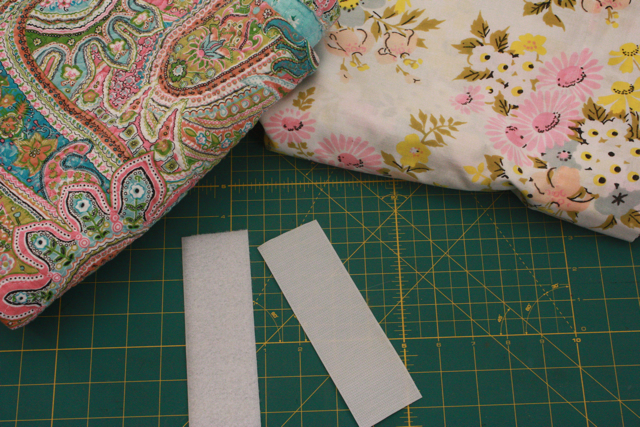 Step 1 – Make pattern pieces.
All measurements include 3/8″ seam allowance.
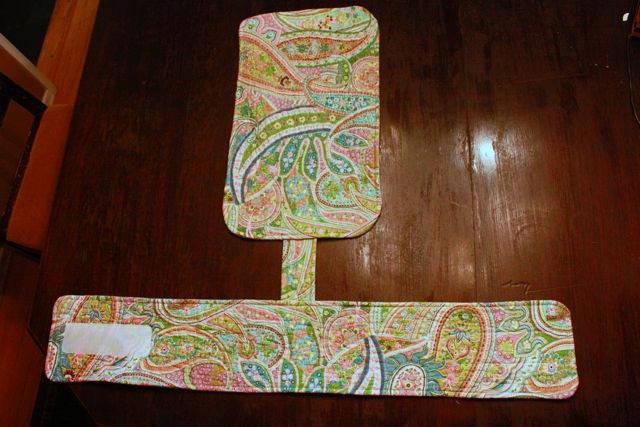
Step 2 – Add markings 2 1/4″ apart at center of each piece as shown in picture.
These markings will help you place the connector piece.
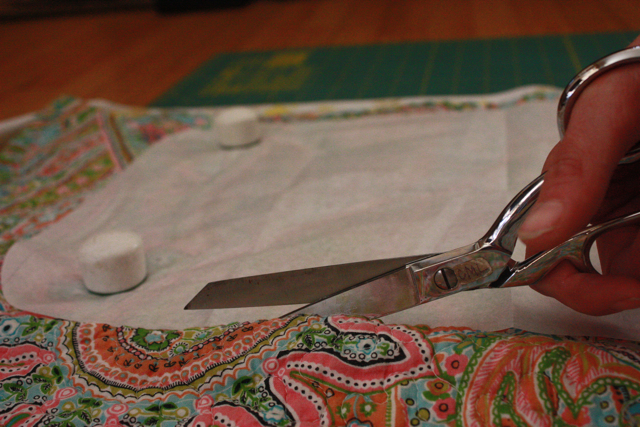
Step 3 – Using a single layer of lining and a single layer of quilted fabric, cut each piece out together.
Curve the corners of velcro pieces so there are no sharp points.
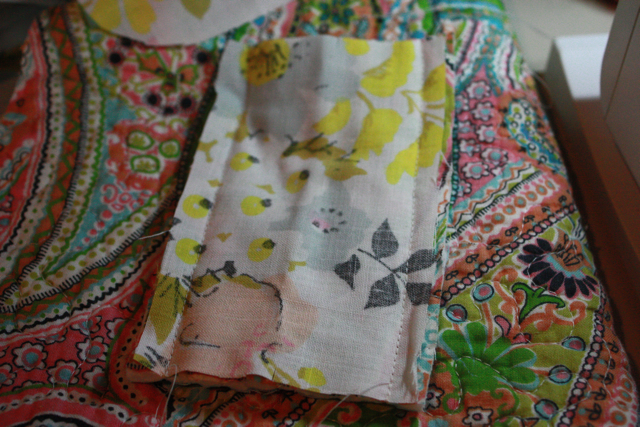
 Step 4 – With right sides together, sew connector pieces together along long edges. (3/8″ seam allowance)
Step 5 – With right sides together, sew seat pieces together, starting at connector mark and ending at next mark, leaving open 2 1/4″.
Step 6 – With right sides together, sew strap pieces together, starting at connector mark and ending at next mark, leaving open 2 1/4″.
Step 7 – Turn all pieces right side out and press.
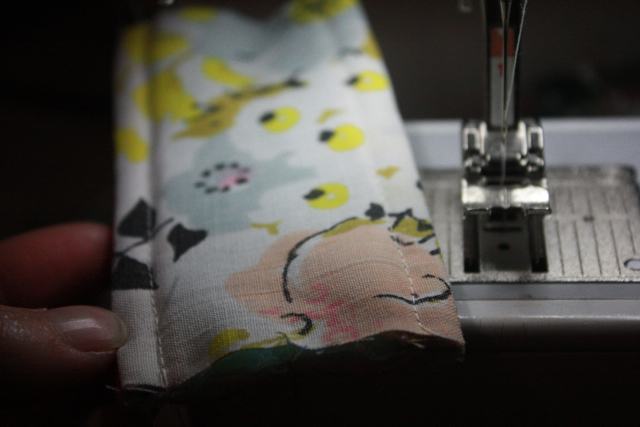
Step 8 – Top stitch connector piece 1/4″ from edge along sewn edges.
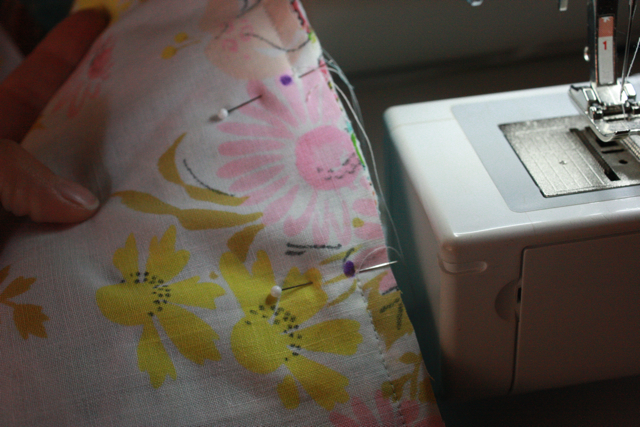
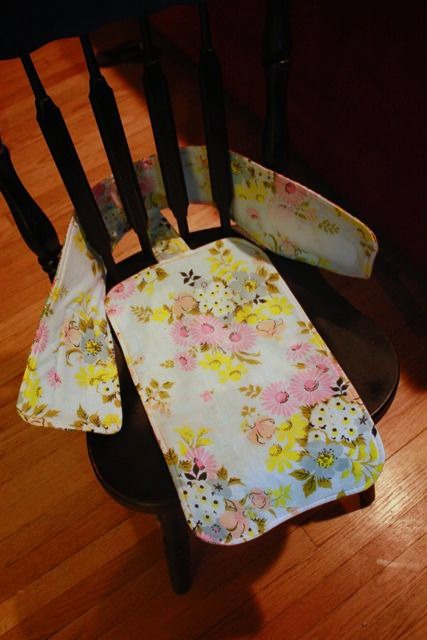
Step 9 – Insert connector piece into opening in seat and into opening in strap. Pin into place.
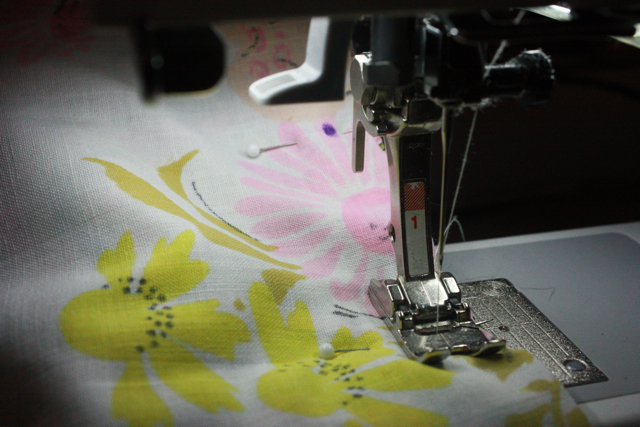
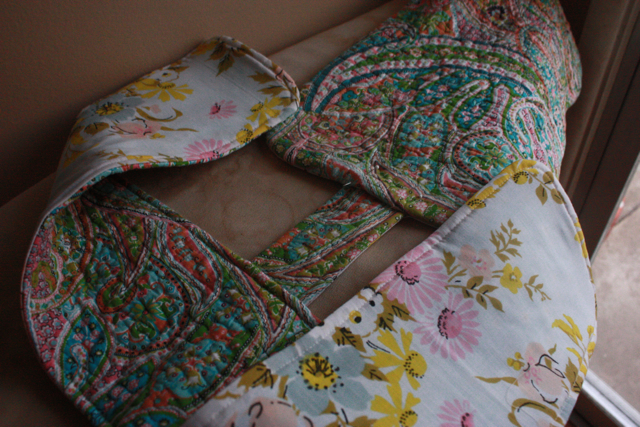 Step 10 – 1/4″ Top stitch around entire edge of seat and strap, making sure to catch connector piece.
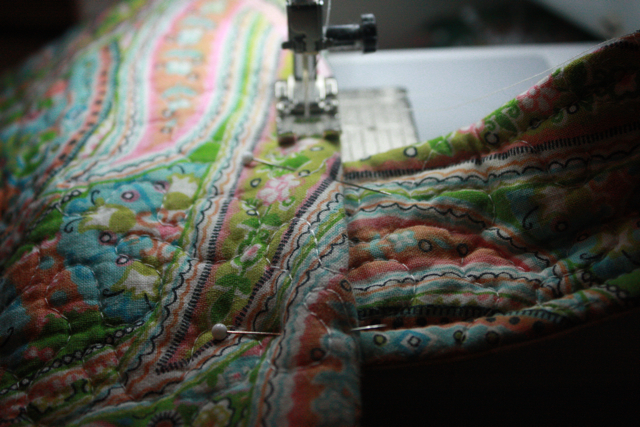
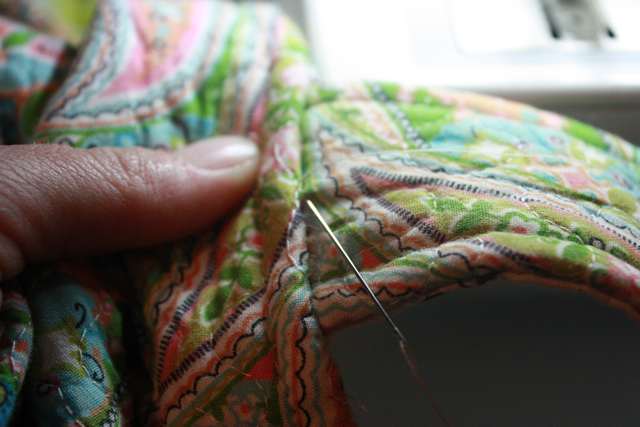
Step 11 – Hand stitch lip edge of strap and seat at connector for a more finished look. or use 1/8″ top stitch to secure lip.
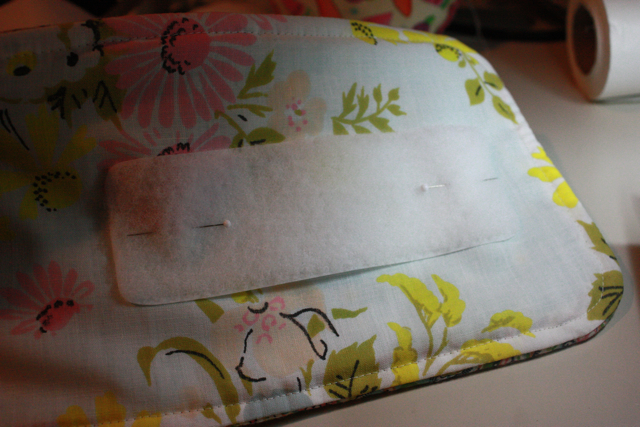
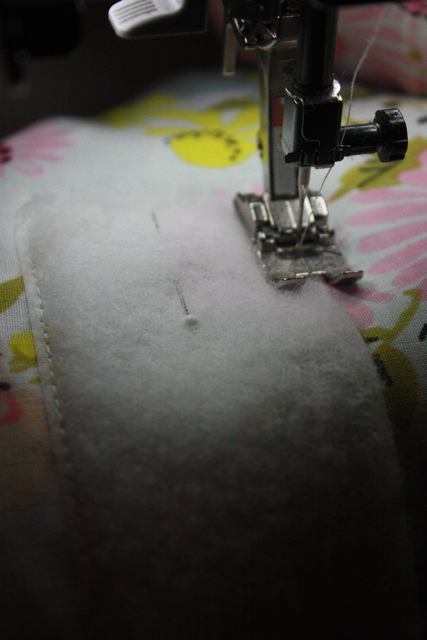
Step 12 – Sew Velcro onto ends of waist strap, centering on strap & placing it 1 1/4″ away from short edge.
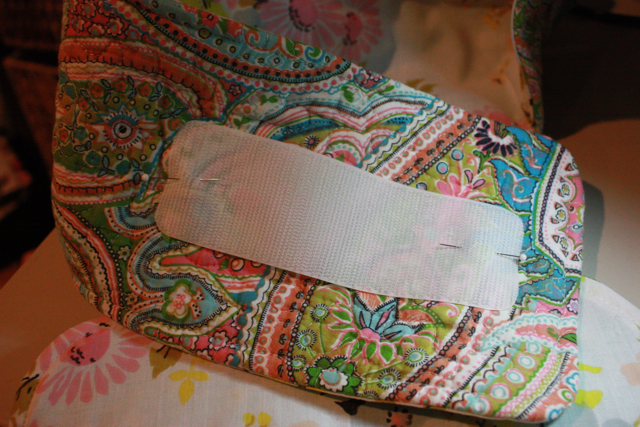 Scratchy side goes on outside of strap.
Soft side goes on inside of strap.
Sew all along the edge.
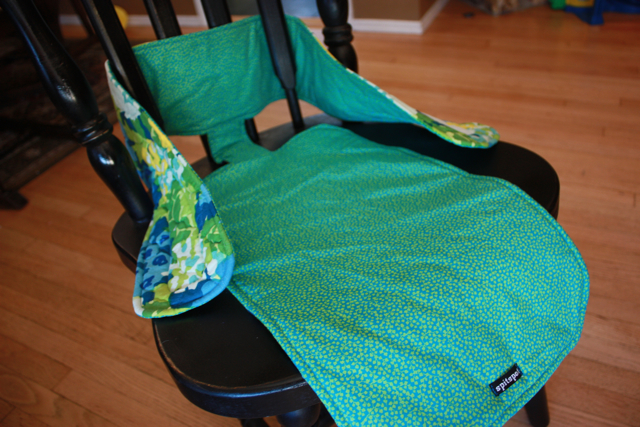
You’re done!
Weave through chair back.
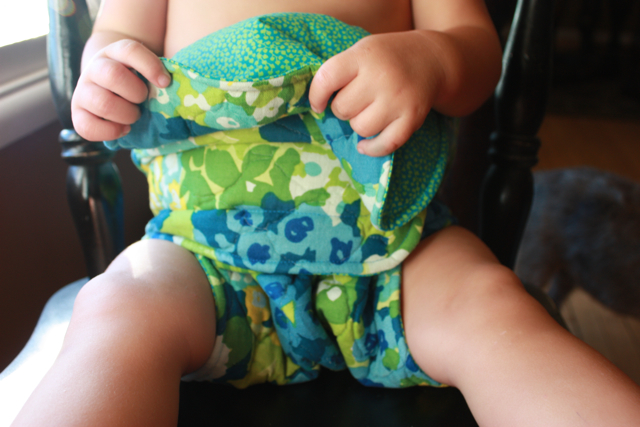
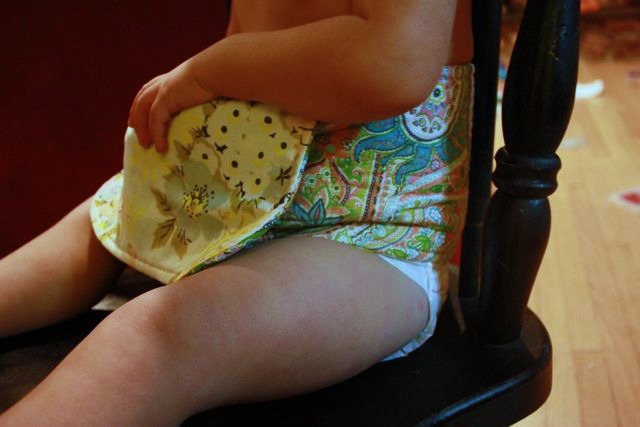
Insert hungry kid!
In these days of 5-point harnesses, I must remind you this travel chair should always be used with parent supervision. It does not 100% secure child to chair. Never leave child unattended.




{ 4 trackbacks }
{ 39 comments… read them below or add one }
OH THANK YOU for posting this! I have searched and searched and finally stumbled upon this and am ecstatic. I have an old wooden high chair, back before everything was made of plastic and 5 harness bungee jumping straps. I need some way to secure my child so that he doesn’t 1)slip out 2) tip over or 3) slide around while eating. I don’t need him to be clamped down to the point of immovability! So this is perfect and I think even given my limited sewing capabilities I can accomplish this. You are my hero today. Thank you.
[Reply]
I will be making two of these this coming weekend. One for us to travel with and one for my mother’s old wooden high chair. Thank you!!!
[Reply]
I just whipped up one of these as a Sunday afternoon project. I love it! Perfect for visiting Grandma next week. Love your blog! I predict lost of “wasted” time looking through your posts this evening.
[Reply]
did you use a double sided quilted fabric and use the cotton over it? Where did you buy the quilted fabric and how much did you use?
[Reply]
This is Carrie
Twitter: thisiscarrie
Reply:
April 22nd, 2011 at 3:02 pm
I used a thrifted, quilted ottoman cover for my fabric. It was only one sided. I’ve also used an old double sided quilted bedspread that was given to me. You could definitely use a double sided quilted fabric from the fabric store although I find it to be really expensive.
[Reply]
What a great idea. I just made one over the weekend (took 3 days of buying fabric, batting and experimenting) using your design as the start-off point. Where I live and intend to use it, lots of chairs in hawker centres are plastic without slots to fit the belt through. I added an extra panel to wrap around the chair back and joined it back to back with the front belt so that there is a front piece which wraps around baby only. I also joined the seat directly to the belt without the connector.
[Reply]
Jessica Reply:
May 25th, 2011 at 5:04 pm
I like your idea of an additional strap to go around chairs. I want to use it camping. Would it work on a camp chair? Do you have a photo? Thanks!
[Reply]
Corrinne Reply:
June 14th, 2011 at 3:20 am
I have a picture but don’t know how to upload it.
I recently took it to Europe with me and it came in very useful at when visiting friends and didn’t take up much space.
[Reply]
I made one of these yesterday for my 9-month-old so he can use the old wooden high chair at my mom’s house that I used when I was a kid. Can’t wait to try it out! Thanks for the tutorial, it really was an easy sew. As Corrinne said, it took more time to get my supplies in order, haha.
[Reply]
GENIUS!!!!!! Because whom ever invented those plastic super slippery kid can wiggle and fall out and crack head booster seats should be, well, fired.
[Reply]
Just came across this on Pinterest – awesome awesome awesome!!!!
[Reply]
This is wonderful! I saw it on Pinterest too. I had designed something similar to use in the wagon & shopping carts but it never quite worked right, so it’s in the drawer waiting to be fixed. I think I can turn it into your design, it is so much better.
[Reply]
Hi all, I am a soon-to-be Great gramma & have had a blast sewing, embroidering, quilting, crocheting and knitting for my soon-to-be-seen little great grand baby. I used a similar pattern many years ago & wanted to add a little extra help with the safety of this. 1st, I make the the part that goes under the baby’s but a little wider & then I add a piece of the stuff that you can get to go under throw rugs to make this extra safe. There are several kinds of this, some heavier and some not so heavy. I have also seen a version that is made for shelves to keep your dishes from sliding! I usually don’t attach it but just slip it under the seat part. The weight of the baby will keep it still!
[Reply]
We featured this today! http://bit.ly/otQO6G Brilliant idea, fab tutorial! Thank you 🙂
[Reply]
omg i love this!! i am a mother of 5, 2 older girls 1 2yrs and 5 month twins!! we were thinking of upgrading the van larger to carry all the baby gear required but this will help out huge for space! thank you so much!! what a amazing idea!! now to find and old quilt and dust off the sewing machine!! you are the best!! 😀
[Reply]
I just finished one of these for my 20-month-old. We’re visiting family this week, and this little travel chair will make mealtimes easier. It was so easy to make, and my daughter was really excited about it when we tried it out. Thanks so much for this great tutorial. 🙂
[Reply]
I ran across this on Pinterest – and I love it! I am gearing up to make one these weekend for my 10 month old! Thanks so much – you are now on my bookmarks tab! I’ll be back to browse all your other cool DIY stuff! 🙂
[Reply]
This is such a fantastic project! I’m pretty new to machine sewing and wanted to ask about the logistics of using the batting. Would I pin each section with right sides together, then layer the batting on top of that and sew? Thank you!
[Reply]
I love this! I immediately made two of them (no, seriously, i barely finished reading the post)…one for my littlest (10mo) and one for a friend’s baby girl who turns one in a couple weeks. One is from a double-sided, pre-quilted fabric that i adore! The other is from some brown and pink polka-dotted cotton with pink chenille for the lining. I love how they both turned out. Thank you so much!
[Reply]
Just finished mine. Great tutorial! (Love all your thrifted fabrics!) I added tie straps to the ends of mine for extra wide chairs. I also am considering the extra back panel suggested by Corrinne. Thanks for the great idea!
[Reply]
Twitter: parentpalace
August 10, 2011 at 2:42 pm
Cute and highly functional, I love it!
[Reply]
My mom has a high chair from when she was a baby (circa late ’40s) that we affectionately call it ‘death trap’ since there is no way of securing my nieces in it. Problem solved!
[Reply]
Thanks so uch forposting this pattern! I have a cousin who travels on the road professionally singing and this wllbe th PERECT gift got them a i’s s much easier than trying to transport highchair.
Thanks Again
God Bless
Naomi C.
[Reply]
I just finished one for my 8 month old and am about to start two more for friends. I used a quilted pillow sham that I bought on clearance for the quilted piece. I also have a really cute quilt I found on clearance which I will use on the next two. This was a great tutorial! It was really easy to follow and had great pictures. Thank you!
[Reply]
WOW! THIS IS REALLY FANTASTIC! I don’t have kids, but I know a handful of people who do, and they are getting these for xmas!
[Reply]
This is Carrie
Twitter: thisiscarrie
Reply:
November 25th, 2011 at 7:04 am
I think these would make an awesome Christmas present!
[Reply]
I just wanted to let you know that I love your project and I featured it today at “You Sew Rock Me Fridays” on my blog. You can see it here: http://www.sewrockin.com/2011/12/02/you-sew-rock-me-fridays-7/
Awesome job, I can’t wait to see what else you come up with!
Jamie @ sewrockin.com
[Reply]
These are so cute…but I don’t sew 🙁 do you or anyone else make and sell these?
Fromska[at]yahoo[ dot] com
[Reply]
This is Carrie
Twitter: thisiscarrie
Reply:
December 21st, 2011 at 7:35 am
I think quite a few people have taken my pattern and instructions and are selling them of etsy.
[Reply]
This is FANTASTIC! I was looking for portable high chairs online today and came across this blog. Have made one for my 13 month old and it’s working a treat! Love your blog too! My husband and I are mountainbikers too so it’s great seeing how you’ve managed to incorporate kids + biking — so very inspiring! Happy Holidays!
[Reply]
This is Carrie
Twitter: thisiscarrie
Reply:
January 3rd, 2012 at 7:13 pm
I am clicking over to your blog now! Nice to find other mountain biking families!
[Reply]
great idea I love the way it came out!! It took under an hour and I used left over material from other projects!
[Reply]
Love this! Making for my sister who will have her first baby in a month! Going to use prequilted material and bias tape. Looks so easy! Thanks for the idea. Found you on Pinterest!
[Reply]
This is wonderful, thanks for posting!
[Reply]
This is fabulous! I’ve pinned it on Pinterest and hope to make one for baby #2! 🙂 THanks for the great tutorial!
[Reply]
Thank you!!!! I am a grandma with a 14 month old grandson who stays 3 days a week. Our dining room is too small for a permanent high chair and the boompa? is getting too small. I plan on making at least one tomorrow so I will have it on Friday. (two is perfect, one to wash and one to ‘wear’)
[Reply]
Had my one and only 18mth old grandson Aiden sitting up at the breakfast bar to eat and had to sit next to him and watch him like a hawk as I didn’t have a harness (had considered roping him to the chair). Anyway started looking for booster seats and then patterns on E-bay. I spent hours searching then really did stumble over your sight. Have made 3, one with extra long straps to fit the breakfast bar chairs, one for my daughter to take everywhere with her and one for my 14mth niece. I came up with the non slip stuff for the seat, then later read Ellens hint about it, thought I was the only clever one. Thank you so much for the tutorial. I think your fabulous.
[Reply]
I’m making one of these today. Can’t wait to see how it turns out. 🙂
[Reply]
Thanks for the tutorial!
I plan on making one of these for a 13 month old flower girl and gift it to her/her mom at my wedding. That way she can use it right away (our reception will be in a barn) and keep it for future use like camping and visiting the grandparents! Such a great idea and dual-duty super practical gift to give her!
[Reply]
Perfect – getting ready for vacation with my granddaughter and this will be great! Going to delete the tab and shorten the waistband. Then attach another longer strap to the back of the waistband to go around chairs that don’t have slats. Also going to trim back the seat portion where it draws up between tiny legs so it’s not so bunched up – similar to a disposable diaper – wide at the waist, skinny between the legs.
[Reply]
How old is the baby is the picture that is wearing it? I don’t know if my baby would be too small. He is 5 months old.
[Reply]
This is Carrie Reply:
April 30th, 2012 at 11:27 am
I believe my little guy was 10 mOnths in this photo but I think it would work for any baby that is able to sit up on their own. You just might need to adjust the Velcro placement
[Reply]
Thank you! I love it!
[Reply]
Thanks for the tutorial! So easy and a great idea!
http://betweenthetoys.blogspot.com/2012/05/travel-chair-restraint.html
[Reply]
Very brilliant idea and so fashionable 🙂
I need to make this as I always snagged hubby’s belt to use as a high chair in places for our kiddos 😉 This will work much better and fit in the diaper bag
Thanks so much!
[Reply]
Thank you for this great tutorial. I’ll be making one very soon.
[Reply]