“He’s All Boy” Baby Cap Tutorial
Download the PDF pattern HERE. Size: 0-3 months
*for personal use only
Materials needed: 1 Large men’s flannel shirt, 1 soft knit t-shirt (lining) , 1 button, interfacing
You can also use new fabric: 1/3 yard for cap and a 18″x12″ piece for lining.
For a matching baby blanket made from flannel shirts tutorial, click HERE.
Once pattern pieces are printed out and part A & B of the cap band have been attached together, cut out all pieces as specified on each pattern piece. If using a flannel shirt, all pieces can be cut out of the shirt front, leaving the shirt back for another project.
Cut out lining. You can use a piece of solid or printed cotton or an old t-shirt.
 Cut brim piece from interfacing as well. Pick a quality depending on the stiffness you’d like in your brim.
Once everything is cut, these are the pieces you should have (my lining pieces look mishapen because the knit fabric is rolling a bit).
Sew cap front piece, right sides together, along short, straight edge and press open. Repeat on front cap lining piece.
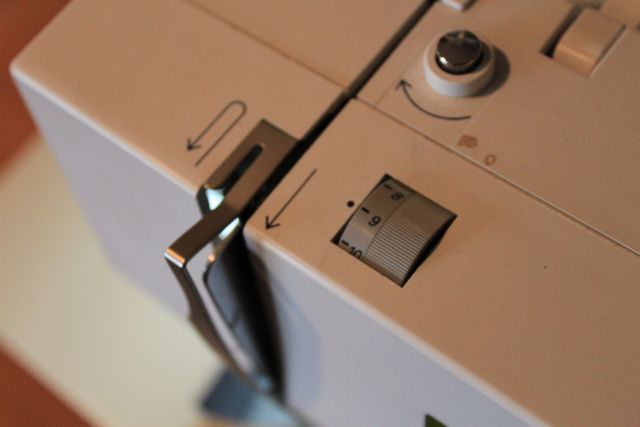
Place an ease stitch around the back cap piece. One way to create an ease stitch is to set thread tension to a tighter level.
 Stitch around back cap piece just shy of the 3/8″ seam allowance. Thread tension should be enough to pull in fabric but should not high enough to gather it (there should be no tucking of the fabric at the stitch line, just rippling). Repeat ease stitch on back cap lining piece.
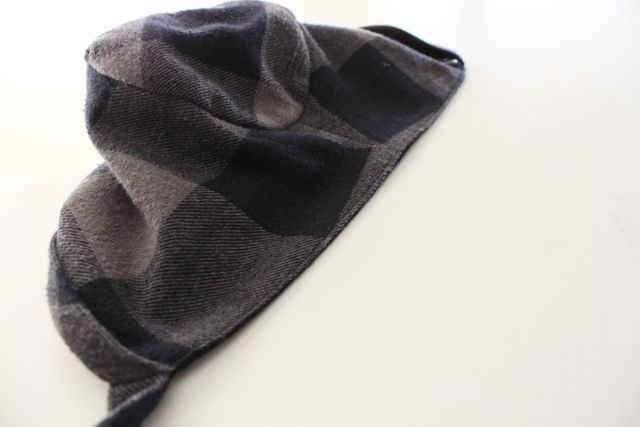
 When the cap back is properly “eased”, it should look like this.
Pin and sew cap back piece to cap front piece, right sides together. Ease stitch should help ease in extra fabric from cap back. Repeat for lining pieces.
 If small tucks happen at seam, unpick and resew, taking care to ease in fabric with out gathers.
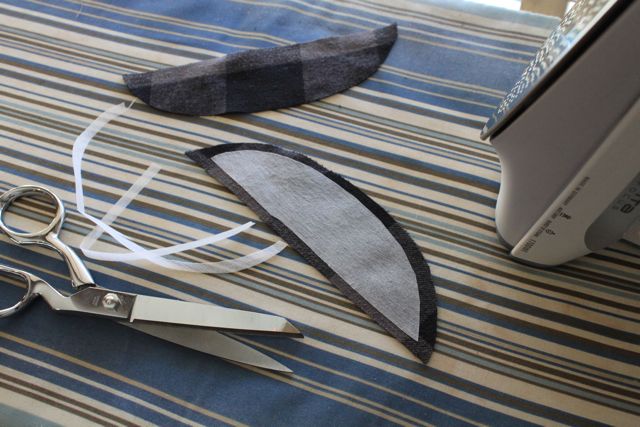
Prepare brim to be attached: to lessen bulk at seam, trim interfacing then iron onto wrong side of brim piece.
Placing right sides together, sew brim together along curved edge. Trim seam & notch to reduce bulk around curve.
Flip brim right side out and press. If you’d like to add topstitching to the brim, now is the time to do it!
Prepare cap band to be attached: press in half along foldline.
Prepare strap to be attached: with right sides together, fold on foldline and sew along one short end and the long end leaving the other short end open to turn.
Trim cap strap seam and corners to reduce bulk. Turn right side out and press.
Pin band and brim onto front edge of cap, matching all raw edges and using notches as guide. Baste to hold in place. The band will hang over the rounded edge of each side.
Once pieces are basted, trim off the extra band that extends beyond the curved edge.
 Baste strap to left corner of cap, matching raw edges, using pattern mark as guide.
 Now, you should have the cap lining and the cap ready to sew together.
 With right sides together, pin cap lining to cap starting at mark at base of cap and ending at other mark at base of cap.
 Leave the space between the two marks at the base of the cap open for turning.
Sew all around cap from mark to mark. If you are using a knit lining, sew pieces together with lining side down. The feed dogs will help keep with knit from stretching while sewing
 Trim seams and corners. Turn cap right side out.
 Press under seam allowance on cap and lining at opening.
 Edge stitch along entire bottom edge of cap to close the opening. My blind stitch presser foot makes it easy to stay straight and right on the edge.
Press bottom edge of cap.
 Based on the size button you’d like to use, sew a buttonhole at edge of strap. You could even use a button off the front of the flannel shirt! Scared of buttonholes? Check out Dana’s tutorial. Or try Velcro!
Sew on button to right side of cap using pattern mark as guide.









{ 6 trackbacks }
{ 25 comments… read them below or add one }
I love it! I think I’ll be making one for my new nephew.
[Reply]
oh so cool! It reminds me of something John Kennedy wore as a toddler – maybe in a photo at JFK’s funeral? But even cooler & updated – I might have to play around with one for my 2 year old.
[Reply]
Wonderful! I have been telling people lately that I wish boys could wear bonnets. Ah ha, this is EXACTLY what I was looking for. Now I just have to go to the thrift store and get some materials.
[Reply]
I have been enjoying the month of boy tutorials, but this is the CUTEST of them all! I am so glad that I have a two month old that I can make one for! Thanks for the great tutorial! Now I can’t wait to check out the rest of your blog!
[Reply]
This looks great! I can’t wait to make it for my little man. Just wondering, approximately what age/head size is the pattern for? Thanks!
[Reply]
hi love your he’s all boys cap and would like to make it for my grandson, I do not have facebook or scribe is there another way to get your patterns. i’m just a grandma that makes clothes for my grandchildren for x-mas and birthdays.
[Reply]
I don’t sew at all (though I would love to learn). I don’t suppose you sell these?
Paula
[Reply]
LOVE the cap! i going to make one for my best friend s little wonder, just three days old.
Is the seam allowance of 3/8 included in the pattern?
x klaartje
[Reply]
I cant wait to make this!! Thank you soo much for the pattern and tutorial.
[Reply]
I have just finished making my first cap; the directions were terrific, and the cap is so cute! However, it looks so small! How can I be sure that the pattern pieces that I printed out are the proper size? My Cap Band piece measured 11.25 x 1.75 inches. Is that the intended size? Otherwise, perhaps I need to enlarge each piece by some percent.
[Reply]
This is absolutely THE cutest thing I’ve seen in a long time. Thank you SOOO much. We will be welcoming our 2nd Grandchild in early September and already know it is a boy. Living in Northern IL an adorable cap like this will be very handy and well used in the Fall and Winters we have.
[Reply]
This is so fabulous!!! Thank you so much for sharing! I cannot wait to make one for my little guy 🙂
[Reply]
Sooooo adorable…havent made one yet…but want to ask..I am involved in a local group that gathers donated items (new or gently used) for needy new moms..it acctually ends up to be a box of about 75 items ..newborn to 12 months .. to give a start up …I know these are for personal use only (not to sell) but would u have an abjection to sharing the pattern with a couple freinds to make some for the donation boxes????
[Reply]
muy facil y bonito, hice dos para mi nieta, con florecitas y otro con rayas marineras y quedan bien .
[Reply]
Oh, I wish there were a little boy in my life to make this for. Soooo cute!
[Reply]
So cute!!! I love it!
[Reply]
I just sewed this for my nephew…so so cute! I used scraps that I had leftover from pj pants and an old tshirt, it looks spectacular! Thanks so much!
[Reply]
Magnifique, justement je désespérais de trouver un patron de béguin version Boy pour mon futur garçon ! Et là, je suis aux anges car il y a même le tuto en images !!!
Merci beaucoup !
[Reply]
I am finally getting around to making this, and I was wondering if you had any suggestions for enlarging the pattern. My boys are 1 and 3, but I still think that this would look great on them in these cold months. I already downloaded and printed the pattern, but I have begun working with it yet. Thanks for any help that you can lend.
[Reply]
This is Carrie
Twitter: thisiscarrie
Reply:
November 25th, 2011 at 7:11 am
Grading this pattern would mean making everything a little bigger for the one year old and a lot bigger for your 3 year old. i would just use the original pattern a guide for shapes and draft your own pattern based on the measurements of your kid’s heads.
[Reply]
I made my hat today and it turned out so nice! It was easier than I thought it would be and I can’t wait to try it on our baby who is due in 2 weeks. 🙂 Are the patterns only for our use or are we able to sell hats made from this pattern?
[Reply]
I just wanted to stop by and say thank you for the wonderful pattern and instructions. This was only my second time sewing with a pattern, but you made it so easy. I made hats for two of my friends’ new baby boys. I just blogged about the results if you want to see how it turned out.
http://jabaayave.wordpress.com/2013/02/07/my-go-to-baby-gift-guide/
[Reply]
Hello !
What a wonderful pattern ! It is so hard to find nice boys outfits patterns !
Could you explain how to increase the size for older babies ? How to divide up the enlargement between the back and the top front piece, please ?
Thank you !
Alister
[Reply]
Are you willing to sell the pattern? In that case, I’d be able to make more caps than the ones I intend to use for gifts. I’m thinking ahead…suspect there will be demand for these!
[Reply]
Hey! Would you mind if I share your blog with my twitter group?
There’s a lot of foks that I thihk would really appreciate your content.
Please let me know. Thank you
[Reply]
Thanks for the good writeup. It if truth be told was a entertainment account it.
Look complex to far added agreeable from you!
By the way, how can we keep in touch?
[Reply]