Tutorial: Refashioned Slim Slack for Boys
If you are stopping by via MADE “Celebrate the Boy“, welcome!
If you’re interested, you can find more “Boy” posts & projects here.
Refashioned from men’s slacks & using the existing button, zipper & back pockets (all the icky parts of making “real” slacks), these slim slacks are a fun alternative for a little boy’s dressy wardrobe.
Intermediate Level Sewing
Let me know if you have any questions or problems with the tutorial so we can work it out!
I would love it if you shared your “Slim Slack” creations in my Flickr group, “Reduce, Reuse, ReFASHION for Kids”
You are welcome to use my pattern which fits average 2T and a slim 3T with added length. Slim 2T might want to take in leg even more.
Waist: 19″ (stretches to 22″) , Hip: 23″ Inseam: 11″
Use 1/2″ seam allowance unless noted (crotch seam).
Download pdf pattern HERE. (make sure print settings are NOT set to scale).
If your boy is larger than the pattern, find your favorite pants pattern and “slim it down”. Then use the tutorial for the pants refashioning technique!
Step 1: Find your sacrificial trousers.
These are from the thrift store. Before purchasing, take a look at the waistband and make sure the construction allows it to be taken off in one piece. I’ve refashioned a couple pairs of pants with buttons at the waist, but this one happens to have an inside metal hook.
You might want to pick up two pairs. One to practice on so you can tweak the pattern, making it perfect for your little guy (I don’t claim to be an expert pattern maker), and one pair to knock out with your new “perfect” pattern and mad pant refashioning skills.
Step 2: Deconstruct the pant.
Unpick belt loops and detach the waistband. The great thing about men’s dress pants is that they are usually made to be easily taken apart and altered.
P.S. Make sure you keep the zipper down throughout the entire process.
Step 3: Slice up the pants
Once the waistband is removed, cut the pant up through the side seams and the inseams. Leave the pant front crotch seam intact.
Cut through the back pant crotch seam
Step 5: Cut out Slim Slacks
Layout the pant front piece and the pant front pattern. Using existing zipper placement, cut pant matching crotch curve and trying your best to match grain line on pant.
Flip pattern over and cut other front pant leg, still matching crotch seam.
The front pants should look like this, using the existing zipper:
Layout back pant panels. Using existing pocket placement (optional), cut back pants. Cut one piece out of each back pant panel flipping to cut right & left pant legs.
Take pant waistband and cut at side seams. Using the front and back waist guides, cut new front and back waistband.
Step 6: Start Sewing. You should have all these pieces ready:
Edge finish inseams and outseams of your pant panels using either a serger or a zig-zag stitch. Sew crotch seam together on back leg pieces (use 1/4″ seam allowance here – usually matches front crotch seam better).
Sew front and back pant together at inseams and outseams, pressing seams flat.
If you decide to use existing pockets on your pant, you might need to tack down the seams at the side because the bulk sometimes won’t want to lay flat. Just a few stitches in the ditch at the side seam will make all the difference.
Use a basting stitch to reattach beltloops at waist (optional).
Sew new waistband together at side seams.
Pin a 9″ piece of 1″-1 1/4″ elastic (depends on width of waistband) to the inside side seam of waistband. Attach a safety pin to the other end.
Fold up waistband and stitch in the ditch to hold elastic in place at side seam (on one end only).
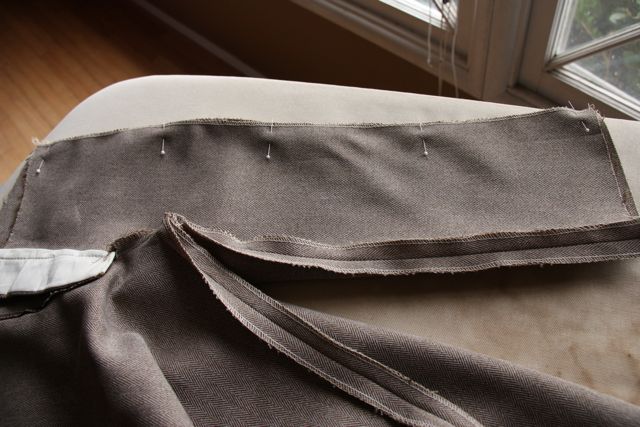
Pin waistband to pant, enclosing elastic along back waist (although it is not stretched and secured yet).
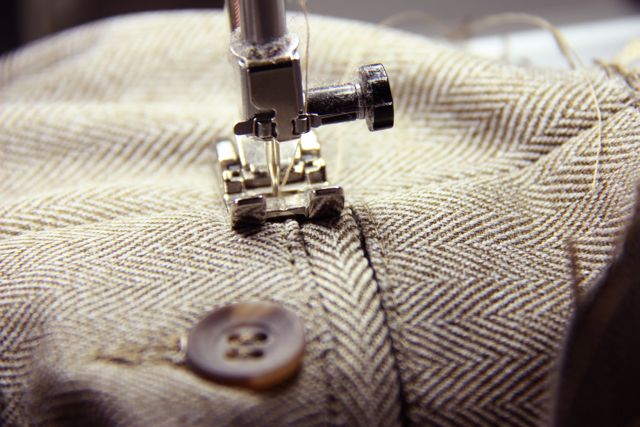
If you have an edgestitch foot, now’s the time to pull it out! Edgestitch around waistband, stopping and starting 1″ before and 1″ after sideseam closest to the end of the elastic that has the safety pin in it.
Now it’s time to thread the elastic the rest of the way through the back waistband. Using the safety pin, guide it towards the waistband side seam. Pin and sew in place. Then, edge stitch the hole closed.
Take a second to tack down the tops of your belt loops.
Edge finish the leg openings, press in hem.
Hand or machine blind-stitch hem.
YOU’RE FINISHED!
Now your boy is ready to be crazy-cool in his slim slacks!


{ 3 trackbacks }
{ 32 comments… read them below or add one }
← Previous Comments
Good Morning! I am featuring these as part of a boys dress up for Easter clothes post which you can find here: http://bisforboycreations.blogspot.com/2011/04/fabulous-finds-for-boys-all-dressed-up.html
[Reply]
I am not good at sewing but I loved loved these pants. I had been looking for church pants that I actually like and could afford and stumbled across your blog. It was a challenge for me but I did it! I like the first pair better but they were super tight! 🙂 But I posted a picture on my blog and thank you so much for going through all the trouble so I could make these cute pants. I love them!
[Reply]
Really cute! I’m featuring it on my blog today!
seemesew.blogspot.com
[Reply]
Very cute! I may have to try this for my skinny little girl as well! (with ladies pants, of course!)
[Reply]
This was so easy to do! I made it bigger but ended up cutting it back down since my 4 year old is so skinny. All I really had to do was lengthen it. I also used a pair of ladies pants, which I noticed tend to have a shorter zipper and crotch so I didn’t have to cut it down! Thanks for making boys pants easy and cute!
[Reply]
The same thing happened to me with the zipper! I’m new and I thought…why can’t I zip this? Pop there it went! I’m sad 🙁
[Reply]
I am really impressed !!!!!
[Reply]
I came upon your post on google and check out a few of your early articles. Stay with the very good posts. Ill likely be by again to read more, thanks for the information!.
[Reply]
I love these! I just got a pair of slacks from the thrift store and cant wait to make them!
[Reply]
I was going to ask what if you want to make the crotch area smaller? I know how to do the legs but not that area is their any way I can make that modification?
[Reply]
What type of rotary cutter do you use?
[Reply]
Great tutorial, for a boys wardrobe essential. Your little one looks adorable in his slacks. I featured this tutorial here:
http://sewprettysewfree.blogspot.com/2013/02/sewing-slim-slacks-from-adult-trousers.html
[Reply]
Just what I was looking for! I already started a pair of pants for my son last night just using my imagination and knowledge. All I was curious about was how to finish the waist, thought it would be more tricky but doesn’t seem to be. guess I had better get back to work now that I have some insight! thanks!
[Reply]
I made these yesterday (from a pair of ladies pants as it was the fabric I liked best at the thrift store). I am hoping to do a spin on a vintage theme for family photos and was very happy with how the pants turned out. Thanks so much for posting this tutorial!!
[Reply]
I love these! I found a pair for $1 at the local thrift store! Whoop! My little guy looks super cute in them. Thanks so much for the tutorial!
[Reply]
At long last an internet site that is certainly straightforward to operate around.
[Reply]
We always manage to discover inferior web sites, but I was thankful
to find yours. Great job.
[Reply]
Howdy just wanted to give yyou a quuick heads up.
The ext in your article seem to be running off the screen in
Firefox. I’m not sure if this is a formatting
issue or something to do with internet browser compatibility but I figured I’d post to let you know.
The style and design look great though! Hope you get the issue solved soon.
Many thanks
[Reply]
I had a hard time maintaining the heater block temp.
A related problem concerns limiting your business by choosing a too narrow DBA.
6 fuel oil are called residual fuel oils (RFO)
or heavy fuel oils (HFO).
[Reply]
Every weekend i used to pay a quick visit this site, because i want
enjoyment, for the reason that this this site conations in fact good funny data too.
[Reply]
Hey there,
How would you go about ” slimming” your own wider legged pants pattern as you suggest?
Thanks!
[Reply]
I stumbled across your wonderful site and am so thrilled! Thank you for your efforts in showing how to make pants for boys out of men’s trousers.
My grandson is a slender shoot…..growing taller but not wider…very hard to get good trousers that don’t look like skirts on him!
I have already cut out a pair to put together today…..found you last night!
Now for a jacket maybe?? Hint hint!
[Reply]
It’s an amazing article for all the online viewers; they
will take advantage from it I am sure.
[Reply]
Hi all, here every person is sharing these kinds of familiarity,
so it’s fastidious to read this weblog, and I used to pay a
quick visit this website everyday.
[Reply]
You can definitely see your skills in the work
you write. The arena hopes for even more passionate
writers such as you who are not afraid to mention how they
believe. At all times go after your heart.
[Reply]
Hey there! I know this is kinda off topic however , I’d figured
I’d ask. Would you be interested in trading links or maybe
guest authoring a blog post or vice-versa? My blog
goes over a lot of the same topics as yours and I think we could greatly benefit from each other.
If you are interested feel free to send me an e-mail. I look forward to hearing from you!
Great blog by the way!
[Reply]
Thanks , I have just been looking for info about this subject for
a long time and yours is the best I have came upon so far.
But, what in regards to the bottom line? Are you positive
about the source?
[Reply]
I do not know whether it’s just me or if perhaps everybody else experiencing issues with your site.
It appears as though some of the written text in your content are running off the screen. Can somebody else
please provide feedback and let me know if this is happening to them as well?
This could be a issue with my internet browser because I’ve had this happen previously.
Many thanks
[Reply]
It’s a awesome comfortable style for kids dress. Thanks for informative article and i will apply this method in my professional life.
[Reply]
Thanks for the pattern. My sons new pants turned out awesome.
[Reply]
Hi there, I made trousers this way for my son 30 years ago now thanks to you the old skills are being awakened and am making them for my grandsons!
[Reply]
Very informative article, thank you for sharing it.
[Reply]