Tutorial: Kid’s Reversible Fat Quarter Apron

by This is Carrie on June 15, 2013

Not being a quilter myself, it took me a long time to figure out what a “fat quarter” was. All I knew was that I loved collecting cotton prints for small applique projects and those little pre-cut, fat quarter pieces always seemed perfect and right on budget.  With just 2 fat quarters and a package of double fold bias tape, you can whip out this perfect-for-gifting, reversible apron in just about an hour.

The fat quarters for these two aprons came from Modern Yardage, a fabric printing company that features textile designs of a carefully curated group of talented artists and graphic designers.  These particular prints were all created by Heather Dutton of Hang Tight Studios.

Be warned, the site is a black hole of beautiful prints in a zillion scales and colorways.

Chaise Lounge Chevron in Lakeside

Arborteum is Golden Sun Multi

Triangulum in Black Betty

Funfetti in Summer Peach

Tutorial for a Kid’s Reversible Fat Quarter Apron

Supplies: 2 coordinating fat quarters, 1 package of double fold bias tape (I used 1/4″  but you can also use 1/2″).

Step 1: Layer fat quarters with right sides together, matching all edges. Cut 2 apron pieces at once using the measurements below.  Cut 2 pocket pieces from the scraps.

Step 2: Finish top edge of each pocket with a 1/4″ roll hem.  Iron over 1/4″ on the remaining 3 edges.  Pin pocket to each apron piece and stitch in place leaving top, finished edge open.

Step 3: With right sides together, sew apron pieces across the top, down the sides and across the bottom, leaving the armhole curve edges open. Trim corners. Turn apron right side out and press.

Step 4: To make the ties, start sewing bias tape closed for 17″. Then insert raw edge of the first armhole into the fold of the bias tape and continue to sew bias tape around armhole. When you reach the neck, continue to sew bias tape closed for 13″ then continue to sew bias tape around raw edge of second armhole. When you reach the end of the armhole, continue to sew bias tape for another 17″. Cut and knot each end of ties.

Fits kids ages 2-6.

Disclosure: I was provided with fat quarters from Modern Yardage at no charge in hopes I would make something fun and choose to blog about it.  All opinions, ideas and tutorials are my own.

Share

{ Comments on this entry are closed }

During my trip to NYC and the Lion Brand Yarn Studio last fall, I learned how to dye yarn (and my fingers) with Sharpie markers.  It’s such a fun an easy way to enter the wide world of yarn dyeing and a perfect summer project.

Supplies: Yarn blank (purchase here or knit yourself–mine was machine knitted with Lion Brand Fisherman’s Wool), Sharpie markers, spray bottle, table protection.

Steps:

1. Color onto the blank using colored sharpie markers. I decided to do a variegated stripe.

2. Spray with water or with Isopropyl rubbing alcohol (%91) so that the ink starts to bleed.

3. Using an iron on maximum setting, heat set each section for 3-4 minutes.

4. Unravel the blank and wrap into a ball

5. Make a project! (I haven’t quite gotten to this step yet.

Thanks to the girls at Lion Brand Yarn for teaching me a fun, new technique!

Share

{ Comments on this entry are closed }

She Swims!

by This is Carrie on May 25, 2013

She had been begging for months and months to join the swim team. Finally I conceded to try it out for three months with the promise that she wouldn’t complain and I wouldn’t complain.  Well it’s been three months and she held up to her end of the bargain (even through the cold winter months at an outdoor pool), but it’s easy not to complain when you love something as much as she loves swimming.  I, on the other hand, still have to get used to all the shuttling to practices and the long days at swim meets.

I do love watching her swim.  The improvement she has made these last few months is staggering.  Her butterfly is better than mine will ever be and I fear the day she beats me in a 50 freestyle race is just around the corner.

Share

{ Comments on this entry are closed }

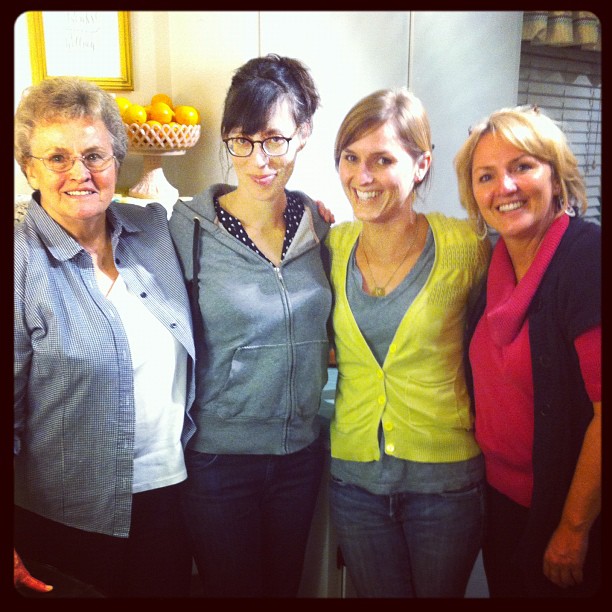
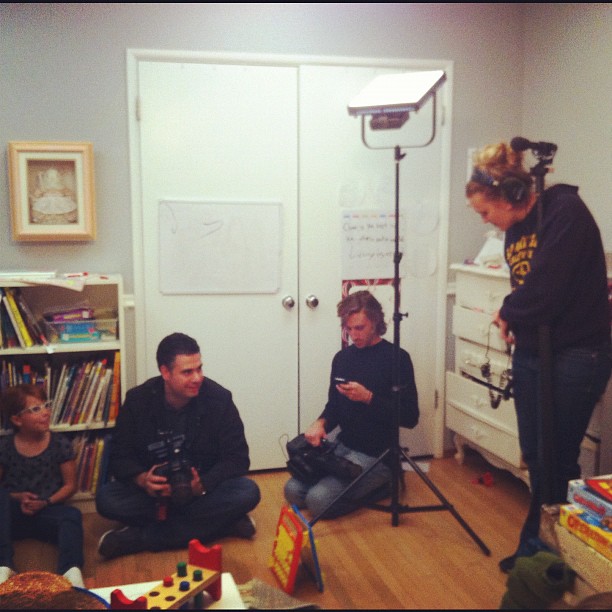
Back in the fall, comedian, Andrea Rosen and her camera crew came over to chat with me, my mom and my sister about motherhood for her new show “Take Me to Your Mother”. During the casting process, they were looking for “Mormon Moms” and asked us in our audition tape to not only share some mothering advice but to also tell them what it means to be a “Mormon Mom” (you can see part of the audition video HERE –  It’s a video I will always cherish and I am so glad my mom, sister and I were able to make this together). At some point, the show became less about our religion and more about our supposed efficiency based on the amount of children we have. It’s funny because I’ve never considered myself as efficient. It’s more about learning to let go of things that don’t matter to you to make room for things that do.  Having four kids has pretty much forced this lesson upon me and I’m thankful for that even when it means having cupboards that vomit baking pans.

The kids loved all the attention and were fascinated by the process (except for the baby who woke up sick that morning….maybe because he gets bathed so infrequently…hee hee).  But they were a little bummed that we actually never went mountain biking. They even got dressed up in their Team Sparkle skirts (the only appropriate biking gear in their eyes)! I was a little bummed they caught me eating on camera during the lunch break. Those tricky cameramen. At least they didn’t get the bare bum of my son as he dropped his pants entirely to pee in the bushes in front of the whole crowd.

The episode finally aired last week & will continue to air on NickMom, but you can also check out the episode HERE.

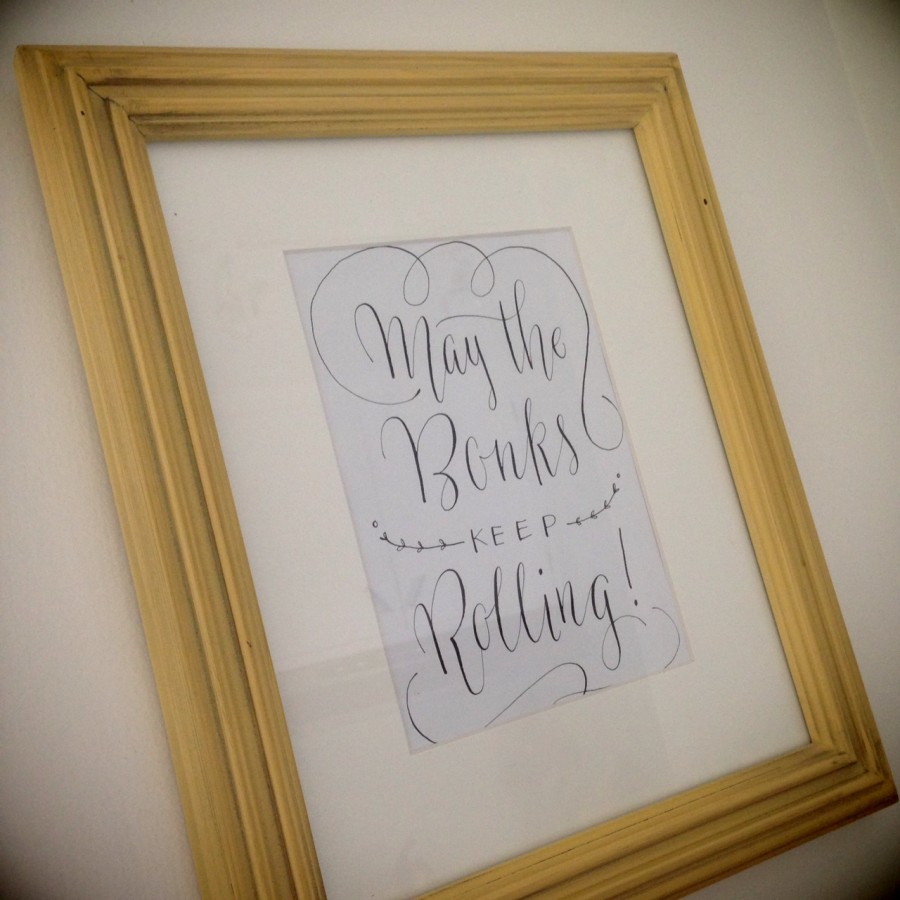
Scroll down for the recipe to my all-time favorite comfort food & long time family tradition: Rolly Bonks

(calligraphy art by Melissa Esplin – given to everyone in our family to hang in their kitchen as a reminder that family traditions are important)

The Famous Rolly Bonk Recipe {aka tuna croquettes}

Ingredients:
1 1/3 cups instant rice
1 can solid packed tuna or 2 cans regular tuna drained
1 cup grated cheese
1 can cream of mushroom soup divided (or cream of chicken)
1 egg separated
Crushed corn flakes

Instructions:

Cook rice according to package directions. Add 1/2 can of soup, tuna, yoke of an egg, and cheese. Mix. Beat egg white with a little water. Roll rice mixture into 2.5″ balls, roll ball in egg white, and then in corn flake crumbs. Deep fry in hot oil until lightly brown. Mix remaining soup with 1/2 can of milk or water. Spoon over Rolly Bonks.

Share

{ Comments on this entry are closed }

Easter snuck up on me this year so the family’s outfits were a combination of what we already had in our closets + what I found at Target + a few refashioned items from my large stash of thrifted “supplies”.

The boys each got a new, handmade tie. Baby Brother’s bow tie was made out of a thrifted plaid skirt and Big Brother’s tie was refashioned from a thrifted men’s tie–just shortened and made skinny.  Refashioned ties are probably my favorite, quick projects for my little guys (especially since I can usually find awesome ties at the thrift store for only $1).

Find my Bow Tie Tutorial HERE.

Baby Brother also got a new pair of pants refashioned from a thrifted pair of men’s blue-striped, polyester slacks.  These slacks were straight out of the 70’s and had so much stretch to them, they may be the most comfortable pair of little boys dress pants ever made.

Find my Slim Slack tutorial HERE.

Target supplied us with Pumpkin’s cute, aqua dress and Princess’s adorable peplum top.  The yellow skirt was from my stash of thrifted treasures and fit her waist perfectly.  It just needed about 12 cut off the bottom.  It’s a bit of a shame the peplum top covered the belt detail, but I have a feeling this skirt will get a lot more wear out of it beyond Easter.

Outfits from Easter’s past:

Pillowcase Dress 2007

Pillowcase skirts 2008

Vintage Sheet Dress# 1 2009 Vintage Sheet Dress #2 2009

Dresden Plate Quilt Top Easter Dresses 2010

Vintage Quilt top Easter Dresses 2011

Bow ties for the boys 2011

Vintage Sheet Skirt 2012

Homemade necktie 2012

Share

{ Comments on this entry are closed }

We went hoping for a Whaleapalooza.

And that’s exactly what we got the day we went on a 2 hour whale-watching adventure with Dana Wharf.

After we boarded the “Dana Pride” with about 50 other whale-watchers, we found a spot to sit down inside. I figured it would take us a while to get out into the water and then we’d venture out to the outside of the boat to see some marine animal action.

Boy was I wrong.  From the moment we launched off the dock, there were animals to see. We abandoned our spot down below and remained on deck for almost the entire 2 hour trip.

I was a little worried about The Baby and his 2-year old attention span during our 2-hour tour, but he loved every minute of it.

It helped that we found a HUGE pod of dophins about 5 minutes into the tour.  There must have been at least 100 surrounding the entire boat.

Then we spotted our first gray whale.  Spotting the gray whales took a little more patience since they only surface every 3-5 minutes.  I missed getting a photo, but we saw those beautifully barnacled animals spray, surface and even whip their tales a few times.

Even though we were on a search for whales, our favorite part of the trip might have been when this friendly sea lion swam right up to the edge of the boat and said “Hi”.

Sidenote: in our rush to get out of the house for our 10am trip, I didn’t have any breakfast. Turned out to be a fortuitous mistake because this breakfast burrito they made me right there on the boat was the MOST DELICIOUS breakfast burrito I’ve ever eaten (lots of other snacks, drinks and burgers are also available).

We said good-bye to the gray whales and went on a search for a group of fin whales that had been spotted close by.  With five of them surrounding the boat, you’d couldn’t miss catching a glimpse of the second largest whale in the world.  Truly amazing.

On our way back to the wharf, Big Brother got a refresher lesson on all the different animals he had seen from one of the ship’s many knowledge members of the crew.  We learned so much on our trip from the crew and Captain Todd which made me feel silly about the tiny bit of guilt I had for pulling the kids out of school that day.

Now’s the time to take the family on a whale watching trip with Dana Wharf since Gray Whale season runs through April.

Disclosure: We were provided the whale watching adventure at no charge by Dana Wharf in hopes we would have a great time and I would choose to blog about it.  Guess what? We had a blast and I was so excited to blog about our experience.  All opinions are my own and my good reviews cannot be purchased.

Share

{ Comments on this entry are closed }

I wanted her to have something new to wear when she sang her first duet in church the Sunday before Christmas. I also wanted her to be able to wear that something after the holidays.

A quick look through the stash and a piece of vintage fabric (snatched up at an epic estate sale years ago) called out to me, telling me what kind of dress it’d like to become. A small piece of pink brocade randomly purchased at Walmart seemed an unlikely pairing, but I felt like it worked.

The a-line dress and peter pan collar pattern drafting went quickly, but I’m sure glad I found the perfect sleeve while sifting through my collection of thrifted and vintage patterns.

I almost ditched the button cuffs for lack of time, but I’m glad I stayed up that extra hour to get them finished.

From there, it was all in the details.  Sock bun? Check. Bright tights? Check.

It may not scream Christmas holiday, but it did scream confidence which is exactly what she needed to sing her duet in church.

Share

{ Comments on this entry are closed }

It’s been a while since I organized the Garage Sale for Kiva with some women from church. Starting with only $300 in proceeds from the sale, we’ve been able to loan the same money  again and again over the last 4+ years, empowering over 71 women in 32 countries through Kiva’s microfinance program  It’s pretty amazing what our discarded stuff has been able to accomplish.

Loans made: 71
Total amount lent: $1,825
Total amount repaid: $1633
Total amount lost: $10

32 countries: Cambodia, Bolivia, Pakistan, Tanzania, Togo, Mexico, Phillipines, Sierra Leone, Uganda, Lebanon, Mongolia, Ghana, Paraguay, Peru, Tajikistan, Afghanistan, Viet Nam, South Sudan, Mali, Senegal, Chile, Armenia, United States, Ukraine, Burundi, Rwanda, Jordan, Kenya, Israel, Palestine, Kyrgyzstan, Dominican Republic.

Share

{ Comments on this entry are closed }

Scroll down for the Giveaway Winner!

I’m really excited to be part of Indygo Junction‘s Fabric Flowers blog tour.  Mostly, because I wanted to get my hands on this book. It’s chock full of tutorials for every kind of bloom you could imagine.  Use them to decorate clothing, accessories, home decor and anything else that can’t escape your embellishing touch.  I absolutely love how many of the flowers are made from repurposed materials (from men’s ties to sweaters).

The flower project that immediately jumped out at me was the Vintage Rose Cuffs.  Because the project calls for just small scraps of vintage lace and fabric, I was able to pull all the materials together from my thrift store/estate sale fabric and trim stash quickly

This project also gave me the chance to pull out my vintage button collection to find the perfect shank button closure.  Due to a delay in the mail, I didn’t have time to finish the project before my blog tour date, so check back soon to find the finish product.  If making the project is half as fun as gathering the materials, I’m in for a real treat.

GIVEAWAY!

While you’re waiting, leave a comment on this post for a chance to win your own copy of Indygo Junction’s Fabric Flowers plus some Clover’s Flower Frills Templates.

The winner will be announced on this post  Feb 25th.

And the WINNER IS:

Fran Gray who said,

Looks like a fun book! Thanks for a chance to win!”

It’s not too late to enter to win!  Check out the rest of the blog tour stops.

A flower a day & 25 chances to win! Don’t miss a stop on Indygo Junction’s Fabric Flowers Blog Tour:

2/2/13 – Indygo Junction Kick Off Post

2/4/13 – Kollabora

2/5/13 – CraftFoxes

2/6/13 – Sewing Secrets

2/7/13 – Princess Lasertron

2/8/13 – Dollar Store Crafts

2/11/13 – Tatertots & Jello

2/12/13 – Family Ever After

2/13/13 – This Mama Makes Stuff

2/14/13 – Amy’s Creative Side

2/15/13 – Today’s Creative Blog

2/18/13 – Lazy Girl Designs

2/19/13 – Skip to My Lou

2/20/13 – The Sewing Loft

2/21/13 – The Crafty Cupboard

2/22/13 – Fishsticks Designs

2/25/13 – Taradara

2/26/13 – Diary of a Quilter
2/27/13 – Craft Gossip

2/28/13 – How Joyful

3/1/13 – Lindsay Sews

3/4/13 – Flamingo Toes

3/5/13 – In Color Order

3/6/13 – See Kate Sew

3/7/13 – Handmade Charlotte

3/8/13 – Sew Caroline

3/9/13 – Indygo Junction Wrap Up Post, Bonus Giveaway & Free Flower Project

P.S.   Use discount code: FFBK8 for 20% off your next IndygoJunction.com order (expires 5/1/13)

Share

{ Comments on this entry are closed }

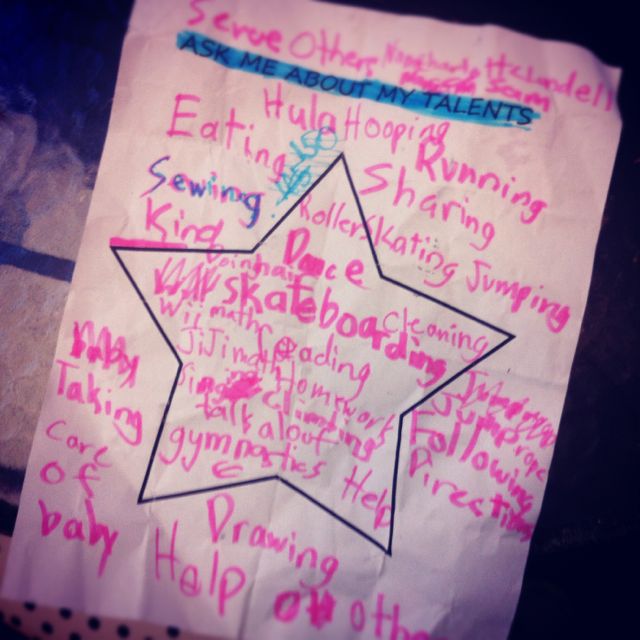
Ask Me About My Talents

by This is Carrie on February 4, 2013

My seven year old has never had a problem with self esteem.

Share

{ Comments on this entry are closed }